Wednesday, July 14, 2010

July 4th, 2010 & Sean's Proposal!

This year our 4th of July started just as any other one would... we went to Mom and Dave's house of course!  Our old nieghbors, Keith and Laura came, as well as Annie, Amanda, Cherie, Meg, Bobby, and Sean.  We played games in the field in front of their house (Washers and Cornhole) where Annie learned her hidden skills at Cornhole!  Afterwards, we went into the backyard and had a yummy BBQ; followed by a hysterical game of Catch Phrase ("reality, reality.. you know-reality!") between the ladies while the guys watched.  As it started to get dark, we all moved back into the front and Dave proceeded to light all of the fireworks he bought-with Ethan and Ryan being our designated firefighters.  Shortly after we ran out of our own fireworks, the ones from the nearby country club started.  They were so pretty!  They had some new ones this year, which were really neat to see.  It never ceases to amaze me at how pretty fireworks can be!

By the time the show was over, it was nearly 10PM, so Meg, Bobby, Cherie, Annie, and Amanda all went home.  I went inside to start gathering our things while Mom, Dave, Keith, Laura, and Ethan went out back to show Ethan the new lights that Mom and Dave hung up in the backyard.  While I was trying to get all of our stuff packed up, Sean told me he wanted to show me something.  I remember him being pretty insistent that he show me...  So we got in his car where he drove me to my old elementary school.  When we got there, there were a lot of people in the parking lot, apparently they watched the country club's fireworks there.  So we went back to my parents house-all the while I was asking what he was doing and that we needed to get Ethan home and into bed.  We ended up sitting on the curb in front of my parents house and he pulled out a little box that he made for me.  On the top it says "How Do I Love Thee..." and inside were 40 hearts, each with reason why he loves me written on them.  He then handed me 10, and told me that he wanted me to read them first.  So I went through them, and the last one said, "Because you said yes" - he then got on his knee, pulled out a ring, and asked if I would marry him!  I was in total shock!  I couldn't believe it. 

The ring is beautiful!  A couple months ago we went looking at rings so Sean could get an idea of what I like.  We also looked online and found one that was really cool looking from the side (we learned it is called a "trellis").  I liked how it was different than the sides of all of the other rings that we saw and how it was just really different... We showed it to the Jared's employee who was helping us (Deeno) and he stated that it is hard to make with the size of the center diamond Sean was thinking about (he never did tell me-he had me turn around when he whispered it to Deeno!) and that it would have to be custom made because they didn't have any like that in the store.  I didn't really think much more about the "trellis" sides, but Sean and his new best friend, Deeno, were able to custom make it just for me!  Everyone is always commenting on how pretty the ring is-Sean definitely did a great job:)


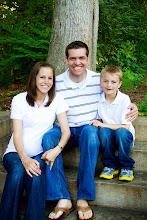
Sean and I are engaged!

Monday, July 12, 2010

July 4th-Recipe

Usually I make the traditional Flag Cake for July 4th, but this year I wanted to try something different.  I went online and found the recipe below and decided to give it a try:

Stars and Stripes Grand Finale Cake
2 pints fresh strawberries, hulled and sliced
1/2 cup white sugar
1 (.25 ounce) envelope plain unflavored gelatin

2 pints fresh blueberries
1/2 white sugar
1 (.25 ounce) envelope plain unflavored gelatin

2 (10.75 ounce) loaves angel food cake, sliced 1 inch thick
2 (8 ounce) tubs frozen whipped topping, thawed

1.  Mix half of the strawberries, 1/2 cup of sugar, and 1 envelope of gelatin in a bowl. Set aside at room temperature to allow the juices to develop and the sugar and gelatin to dissolve, about 15 minutes. Heat in the microwave for 2 minutes on full power, or until gelatin has dissolved. Stir to blend in the gelatin and then mix in the remaining strawberries.


2.  In a separate bowl, mash 1 cup of the blue berries with the back of a fork. Stir in 1/2 cup of sugar, and 1 envelope of gelatin. Set aside at room temperature to allow the juices to develop and the sugar and gelatin to dissolve. Heat in the microwave for about 2 minutes to melt the gelatin, then stir to blend. Mix in the remaining blueberries.

3.  Cover the bottom and sides of a springform or a tall, removable bottom tube pan tightly with aluminum foil to keep the juices from seeping out.

4.  Pour all of the strawberry mixture into the bottom of the cake pan, cover completely with slices of angel food cake, tearing or cutting pieces to fit in a tight layer. Spread 1 container of whipped topping over the first cake layer. Make a second layer of angel food cake, like the first, and pour the blueberry mixture evenly over the top. Arrange the angel food cake in a third layer on top of the blueberries, spread the remaining container of whipped topping on top. Finish the dessert with a final layer of angel food cake.

5.  The layered cake will be higher than the edges of your pan. Carefully lay a large piece of aluminum foil over the cake and place a baking sheet on top. Invert the cake, press the cake firmly onto the baking sheet. Weigh down the mold, using pie weights or bags of dry beans or rice; refrigerate 8 hours, or overnight.

6.  Soak a kitchen towel in very hot water, wring out excess water, and wrap the towel around the cake pan; let stand for 1 minute. Remove the towel. Holding the pan and plate together, shake the cake back and forth to release it from the sides of the pan. Open the springform ring carefully, or pull back the sides of the tube pan. Do not force the cake to release. If it continues to stick, repeat the procedure with the hot towel.
 
WHAT I FOUND OUT:  OK, so I didn't have the fancy "springform or a tall, removable bottom tube pan" but thought a Bunt Cake pan would work fine.  WRONG.  When it was time to get the cake out of the pan, it was impossible, without totally destroying it.  So, I had to serve it to everyone in the bunt cake pan!  Oh, well.  Also, the bunt cake pan definitely did not have sides that were tall enough, so I wasn't able to make all of the layers as the recipe called for (no matter how much I tried to flatten it all down!).  The overall product was OK... as in, I won't ever make it again, but I learned what a Springform Pan is and how, if a recipe calls for it, USE it!

Ethan's Excitement for Church Continues...

Ethan during Sacrament on July 4, 2010...


Well, at least he was quiet! :)

Thursday, July 1, 2010

My New Spice Rack

So I know this sounds lame, but the shelf where I kept my spices has really been driving me crazy.  The spice containers were all crammed with other cooking/baking stuff, stacked on top of each other, and whenever I needed one, it tended to be at the bottom in the back and I would always knock all of the others over in the process of getting the one I needed.  I looked online for a spice rack and I didn't really see any that I liked enough to buy (spice racks are surprisingly expensive!  Well, at least they are more money then I want to spend on one) and the ones I did like would not fit into the small space where I wanted to put it and you had to empty the spices in small magnetic containers (which are an additional cost and I would run into the dilemma of where I should store my extra containers, etc).  I saw one and it gave me an idea of making my own and altering it to make it work for my needs.  I immediately went to Lowes on a mission to get the needed supplies!  Long story short and three stores later, I couldn't find the main supply item that I needed to make my idea into reality (a piece of magnet about 6 inches wide and 2 feet long-I was going to use it as the backboard and then add a small piece of magnet to the back of each spice container). 
What's the next best thing aside from Magnets?  Velcro! (Thanks, Mom!).  So here is my "idea turned into reality" for my spice rack:

It cost about $35 (just the cost of the velcro and the hooks).  I used cardboard that I had from one of Ethan's school projects and modge-podged it with scrapbooking paper, stickers, and ribbon that I had.  Then I added rows of 1" thick velcro.  Afterward, I added a small peice of velcro to the back of the lids of each spice container and used stickers to write "Got Spice?" at the top of one of the boards, and typed out "'by small and simple things are great things brough to pass.'  Alma 37:6" on the top of the other board.  (I ended up having to make 2 columns of "boards" - with each column having 3 boards - so I would have enough space to add more spices as I buy more, but at least they are off of my small cramped shelves and I will always quickly and easily know which spices I own!) 
This is what inspired me to make this...


Below each of these are 2 more boards to add spices to... I have three boards full of spices already, and three more that are empty, ready for when I need to buy any I don't already have:)  They are hanging inside of my pantry, between the door frame and the shelves-completely out of my way!

Wednesday, June 30, 2010

A little Reminiscing...

Tonight I was going through some old pictures and it was so fun to look at them and see how much Ethan has grown! Here are some of my favorites that I just found:


It brought back so many memories as I was going through the ones that I have saved on my computer and reminded me how quickly he is growing.  The pictures above are all from when he was about 2 and younger.  The one in the upper right hand corner is of him in his beloved yellow rainboots-he wore those EVERYWHERE!  Our neighbors across the street always commented on them-he would wear them with shorts, pants, PJs... whenever!  The first one on the second row is him in his Jump-a-Roo that he had fun bouncing around in and next to that is him on his first birthday-not quite sure what to do with the cake.  The first one on the third row is of him sticking his fingers under the bathroom door-he would always do that whenever anyone went in.  He and Sadie have been good pals since the first time we went and saw her at the rescue shelter-she has been so patient with him!  (and notice how skinny she used to be-now she is a tank!)                                                                    

Tuesday, June 29, 2010

Recipe

New Recipe for the week (made it on Sunday): Upside-Down Deep Dish Pizza.

VERDICT: Gross.  I'm not even going to waste my time typing up the recipe for the blog.

Wednesday, June 23, 2010

Recipe Time

Tonight's new recipe...

Creamy Chicken Enchiladas
1 can Campbells Condensed Cream of Chicken Soup
1 container (8 oz) sour cream
1 cup Pace Picante Sauce
2 teaspooons chili powder
2 cups chopped cooked chicken
1 cup shredded Monterey Jack Cheese
10 flour tortillas
1 medium tomato, chopped (about 1 cup)
1 green onion, sliced (about 2 tablespoons)

Stir soup, sour cream, picante sauce, and chili powder in a medium bowl.

Stir 1 cup picante sauce mixture, chicken, and cheese in a large bowl.

Spread about 1/4 cup chicken mixture down the center of each tortilla.  Roll up and place seam-side down in a 3 quart shallow baking dish.  Pour the remaining picante sauce mixture over the filled tortillas.  Cover the baking dish.

Bake at 350ºF for 40 minutes or until enchiladas are hot and bubbling.  Top with the tomato and onion.

SURVEY SAYS... its a keeper!! :)  I didn't add the tomato and onion, though.

This morning when I was going through my recipes, I found "the" manicotti recipe.  I made it a year ago when I had friends over and it didn't turn out so great (the shells were very crunchy because I made it the night before and then baked it the following day-not a good idea!).  About a month ago I made it again-this time all at once, and very determined to have it turn out right!  And it did-yum, so good!

Three Cheese Manicotti
1 (8oz) package manicotti pasta
16 oz ricotta cheese
6 oz shredded mozzarella cheese, divided
6 ounces shredded Monterey Jack cheese
2 tablespoons sour cream
1/3 cup dried bread crumbs, seasoned
1/4 cup chopped fresh parsley
salt and pepper to taste
2 cups spaghetti sauce

Preheat oven to 350ºF.  Bring large pot of lightly salted water to a boil and add pasta and cook for 8-10 minutes or until al dente.  Drain. 

Meanwhile, in a large bowl, combine ricotta cheese, 4 oz mozzarella cheese, Monterey Jack cheese, sour cream, bread crumbs, parsley (I put it through my food processor to make it into really small specks) and salt and pepper to taste; mix well.

In a 9x13 baking dish, spray dish with cooking spray and cover bottom with thin film of spaghetti sauce.

Fill each manicotti with cheese mixture and place in dish; cover with remaining sauce.  Sprinkle remaining mozzarella cheese on top of sauce. 

Bake in preheated oven uncovered for 40 minutes; serve.